
How to access files on network devices using SMBv1 on Windows 10
If you can no longer access network
files, chances are your device is still using the SMB version 1
protocol, which is no longer supported on Windows 10. Here’s a
workaround to regain access to your files.
that provides the ability to read and write files and perform other
service requests to network devices. Usually, you’ll be using SMB to
connect to devices that don’t run Windows, such as a router with file
sharing capabilities, Network-Attached Storage (NAS), or other computers
running Linux.
Although there have been three major releases of the protocol, there
is a chance that you may still have devices running the original
version, such as SMB version 1 (v1) which is old and insecure, and
Windows 10 no longer installs it by default starting with the Fall
Creators Update and April 2018 Update.
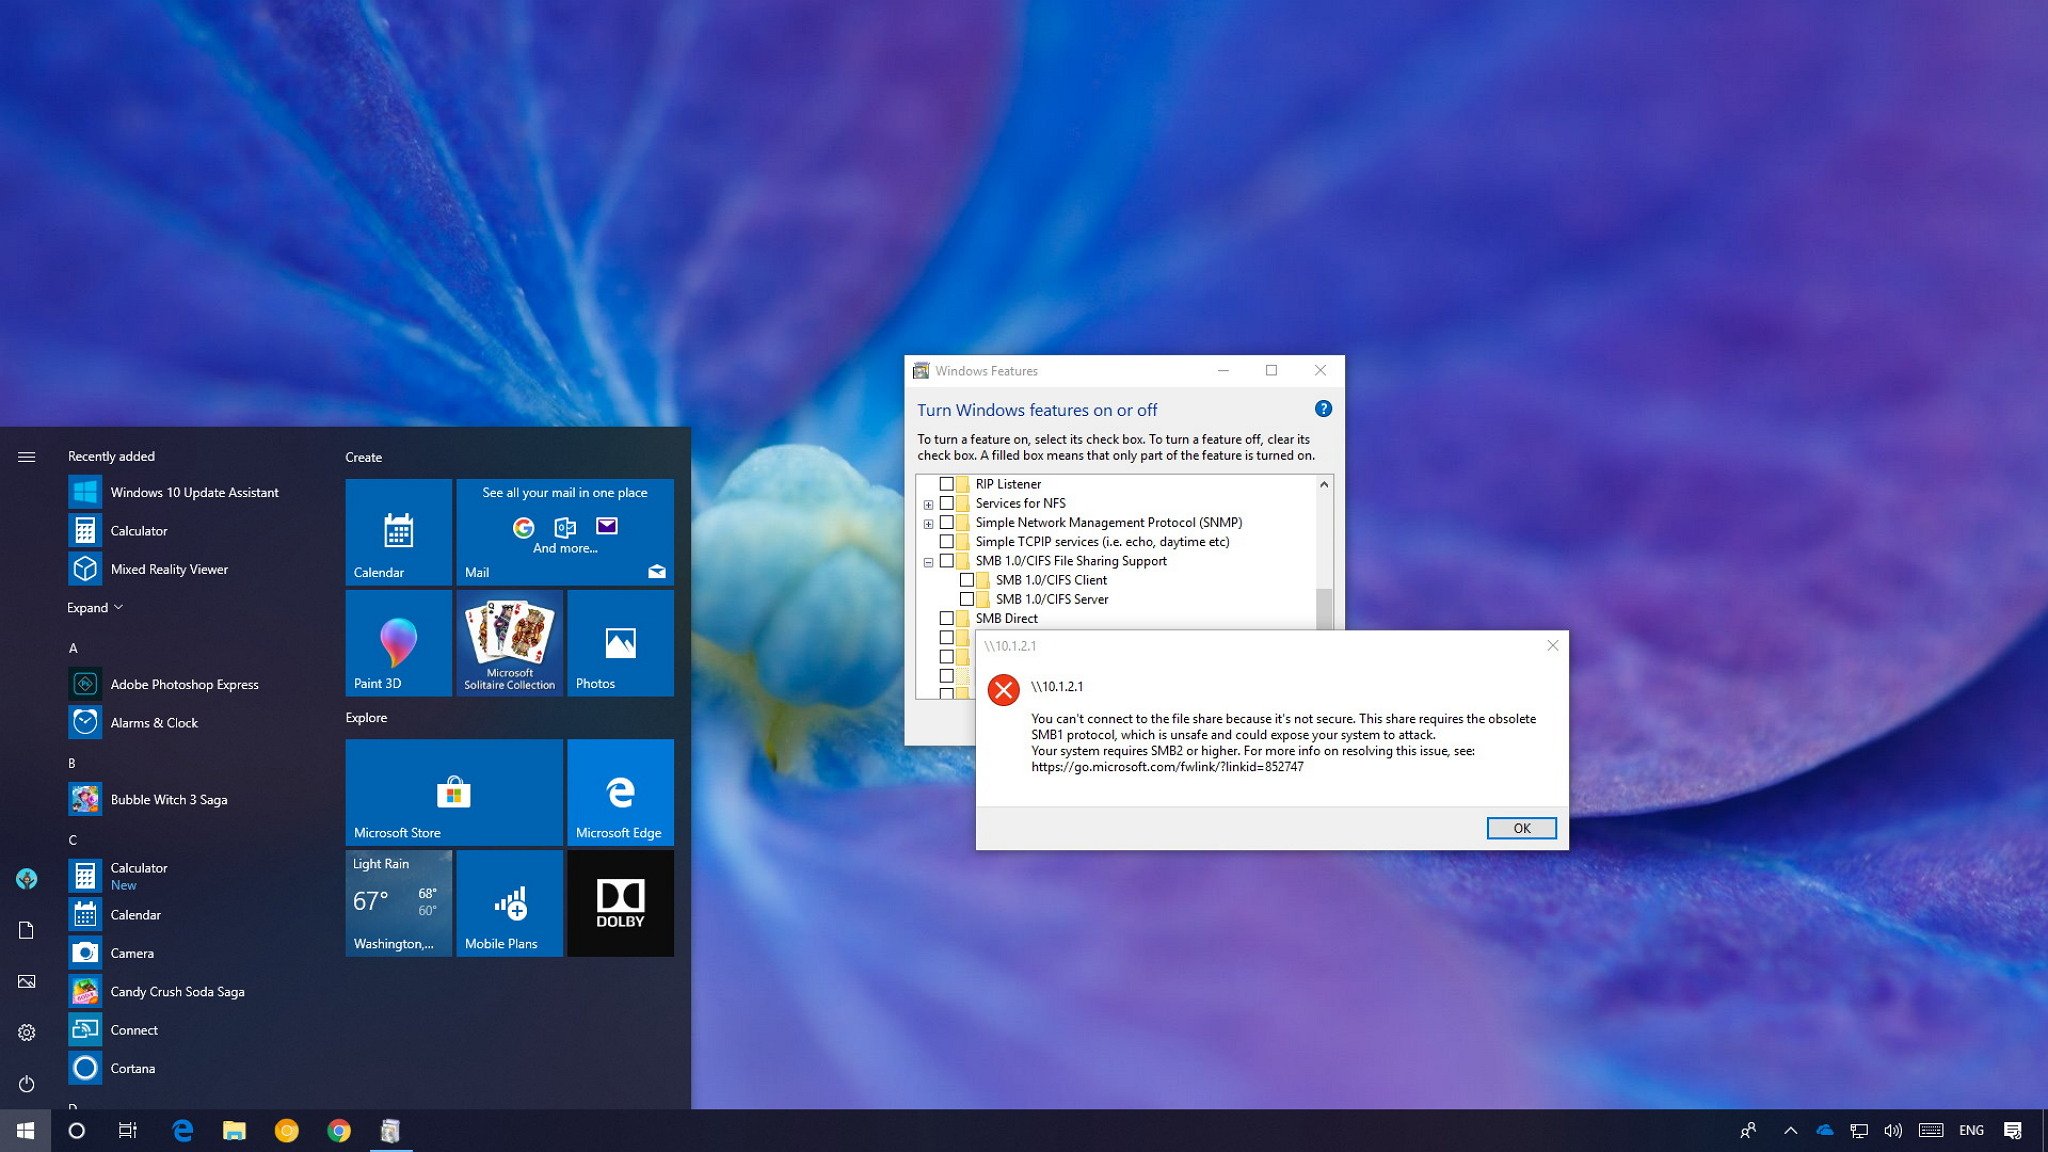
As a result, you’ll get error messages like “You can’t connect to the
file share because it’s not secure;” “The specified network name is no
longer available;” and “Unspecified error 0x80004005” when trying to
access your files.
access because of this issue, you can still temporarily enable the
protocol to retrieve files.
In this Windows 10 guide,
we walk you through the steps to temporarily enable the SMB protocol to
regain access to files stored in the network. Then, we’ll also explain
the process to disable it to keep your computer protected.
How to temporarily re-enable the SMBv1 protocol on Windows 10
If you don’t have direct access to the device running the SMB
service, you can temporarily enable the SMBv1 protocol for the purpose
of retrieving your files using these steps:
- Open Control Panel.
- Click on Programs.
-
Click on Turn Windows features on or off link.

- Expand the SMB 1.0/CIFS File Sharing Support option.
-
Check the SMB 1.0/CIFS Client option.
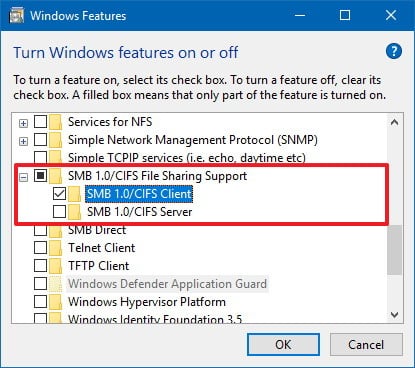
- Click the OK button.
- Click the Restart now button.

After completing these steps, you’ll once again be able to see
and connect to network devices running the old protocol on your local
network from your Windows 10 computer.
Of course, you should only use these steps as a temporary solution to
regain access to your files stored on the network. Ideally, if you’re
saving your data on a drive connected to a router with file sharing
capabilities or NAS, you should contact the device manufacturer for
specific instructions to update the device to a version that supports
SMBv2.02 or later.
If the manufacturer can’t provide an update, you should consider getting a network device that includes support for the more secure version of the network protocol.
After you’ve either migrated your data off the network or you updated
the software that supports the more secure version of the protocol, we
recommend disabling SMBv1 on your computer. You can easily do this
following the same steps mentioned above, but on Step No. 5, make sure to clear the SMB 1.0/CIFS Client option.
How to find out if SMBv2 is enabled on your PC
SMB version 2 should be enabled by default on your Windows 10 installation, but you can check using these steps:
- Open Start.
- Search for PowerShell, right-click the top result, and select Run as administrator.
-
Type the following command to check if SMBv2 is enabled and press Enter:
Get-SmbServerConfiguration | Select EnableSMB2ProtocolIf the output returns True, then SMBv2 is enabled. If the output is False, use this command to enable it and press Enter:
Set-SmbServerConfiguration –EnableSMB2Protocol $true
More Windows 10 resources
For more helpful articles, coverage, and answers to common questions about Windows 10, visit the following resources:
- Windows 10 on Windows Central – All you need to know
- Windows 10 help, tips, and tricks
- Windows 10 forums on Windows Central


_295px - Blog de Cómputo")
 - Blog de Cómputo")