One of my web servers sent me this email this morning:
Subject: The certificate for ServerName.com has expired
################# SSL Certificate Warning ################
Certificate for hostname 'ServerName.com', in file (or by nickname): /etc/pki/tls/certs/server.crt
The certificate needs to be renewed; this can be done using the 'genkey' program.
Browsers will not be able to correctly connect to this web site using SSL until the certificate is renewed.
##########################################################
Generated by certwatch(1)
The only problem is that the server lied. 
You can use the ‘genkey’ program to renew an SSL certificate if your
certificate is signed by a CA (Certificate Authority), but if you’re
using a self-signed certificate (like me), then genkey won’t work. The
quickest solution is to merely re-create your own certificate.
Step 1: Verify Your Current Certificate Directives
If your certificate has recently expired, then it’s probably been at
least a year since you tinkered with it. The warning email told you the
path of your certificate file, but you should also verify the filenames,
locations, and the directives of your web server’s SSL configuration by
doing:
grep SSLCertificate /etc/httpd/conf.d/ssl.conf
You should get something like:
# Point SSLCertificateFile at a PEM encoded certificate. If
 SSLCertificateFile /etc/pki/tls/certs/server.crt
 SSLCertificateKeyFile /etc/pki/tls/private/server.key
 # Point SSLCertificateChainFile at a file containing the
 # the referenced file can be the same as SSLCertificateFile
 #SSLCertificateChainFile /etc/pki/tls/certs/server-chain.crt
You’re interested in the SSLCertificateFile and SSLCertificateKeyFile
directives. This example uses server.crt and server.key as the names of
the certificate files. Yours may be different. Just replace them as
necessary in the following instructions.
Next, take note of the permissions of those two files:
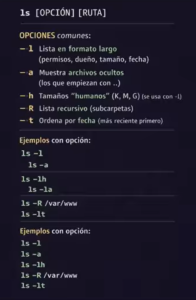
ls -lh /etc/pki/tls/certs/server.crt
 -rw------- 1 root root 1.5K Jun 24 23:02 /etc/pki/tls/certs/server.crt

ls -lh /etc/pki/tls/private/server.key
 -rw------- 1 root root 891 Jun 24 23:02 /etc/pki/tls/private/server.key
They are owned by root and can only be read and written to by root
(permission 600). Your new files will need the same permissions when
you’re done.
Step 2: Create the New Self-Signed Certificate and Key Files
Type the following:
openssl req -new -days 365 -x509 -nodes -newkey rsa:2048 -out /etc/pki/tls/certs/server.crt -keyout /etc/pki/tls/private/server.key
Answer the questions as they are presented to create your new
certificate files, starting with the two-letter country code and ending
with your email address. If you make a mistake, don’t worry. Just re-run
the command and it will overwrite the files.
Your file permissions may not have been affected, but in some cases you’ll need to update their permissions. Do:
chmod 600 /etc/pki/tls/certs/server.crt
chmod 600 /etc/pki/tls/private/server.key
Step 3: Restart Your Web Server
Type service httpd restart to restart your web server and tell it to use the new certificate files.
You’re done!
Pasos rápidos.
################# SSL Certificate Warning ################
Certificate for hostname ‘ ‘, in file (or by nickname):
The certificate needs to be renewed; this can be done
using the ‘genkey’ program.
Browsers will not be able to correctly connect to this
web site using SSL until the certificate is renewed.
##########################################################
Generated by certwatch(1)
# grep SSLCertificate /etc/httpd/conf.d/ssl.conf
SSLCertificateFile /etc/pki/tls/certs/localhost.crt
SSLCertificateKeyFile /etc/pki/tls/private/localhost.key
# openssl req -new -days 365 -x509 -nodes -newkey rsa:2048 -out /etc/pki/tls/certs/localhost.crt -keyout /etc/pki/tls/private/localhost.key
Responder las preguntas
# chmod 600 /etc/pki/tls/certs/localhost.crt
# chmod 600 /etc/pki/tls/private/localhost.key
Estos pasos funcionaron en Fedora 20 .fc20.x86_64
Fuente: http://www.stevejenkins.com/blog/2010/08/renewing-a-self-signed-ssl-certificate-on-fedoracentos/


